How Sonars Work: Key Aspects to Know
Understanding the basics of how sonars work and how to read your fish finder can be the difference between a blank session and landing a PB. Our short tutorial on how sonars work will teach you the basics about your fish finder and give you handy tricks to make reading it easier.
How Sonars Work
SONAR stands for SOund NAvigation Ranging. A sonar device sends pulses of sound waves down through the water. When these pulses hit objects like fish, vegetation or the bottom, they are reflected back to the surface. The sonar device measures how long it takes for the sound wave to travel down, hit an object and then bounce back up. It’s the same echo-location system bats and dolphins use. This information enables the device to judge the depth of the object it reflected off. It also measures the strength of the returning pulse – the harder the objects, the stronger the return pulse.
Once a returning pulse is received, another one is sent out. Because sound waves travel at roughly one mile a second in water, sonars can send multiple pulses per second. The Deeper PRO, Deeper PRO+ 2 and Deeper CHIRP+ 2 send 15 pulses per second. The returning sound pulses are converted into electrical signals and then displayed, showing anglers the depth and hardness of the bottom and any objects in between.
This information enables the device to judge the depth of the object it reflected off. It also measures the strength of the returning pulse – the harder the objects, the stronger the return pulse.
Four things to remember
-

Sonars scan in cones, not lines.
-

A scrolling screen doesn’t mean a moving sonar (or lots of fish).
-

Thicker lines and second sonar returns mean harder bottoms.
-

Spot the arches and you’ll find the fish.
1. Sonars scan in cones, not lines
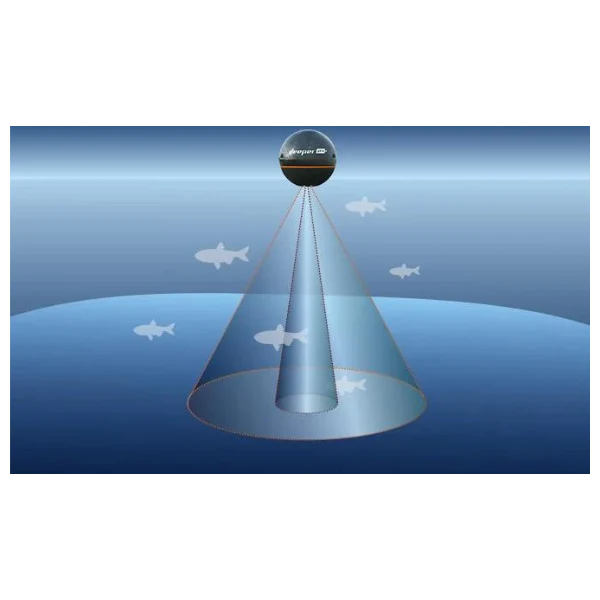
When we read data from our fish finder, we usually imagine that the information we see on our screen is all happening directly under our sonar. So, if we see a fish on the screen, we think it must be exactly underneath our sonar. In reality, the readings we see are taken from a wider area underneath our sonar. And even more importantly, the sonar receives data from a wider and wider area, the deeper you scan. This is all because sonars scan in cones.
Here’s how it works.
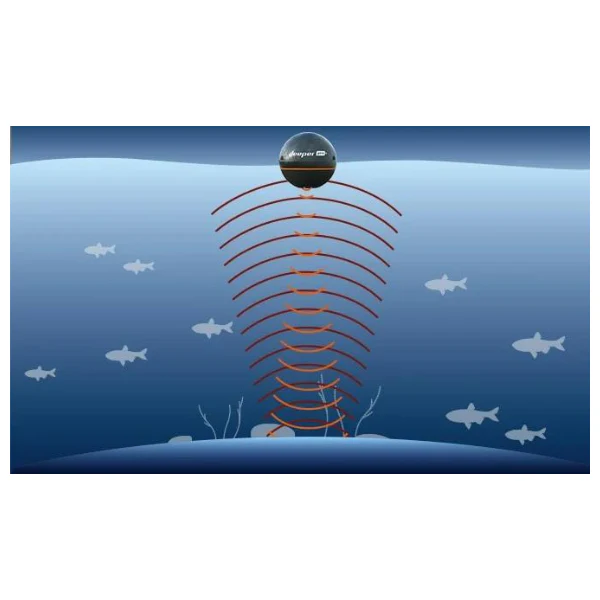
Sonars send out pulse of sound to locate objects. Sound travels in waves, not straight lines, and these waves expand in cones, getting wider and wider.
Most sonars can control the range of the sound wave cone by changing the scanning beam frequency. This is important because in different fishing situations different scanning beams will be more or less effective.
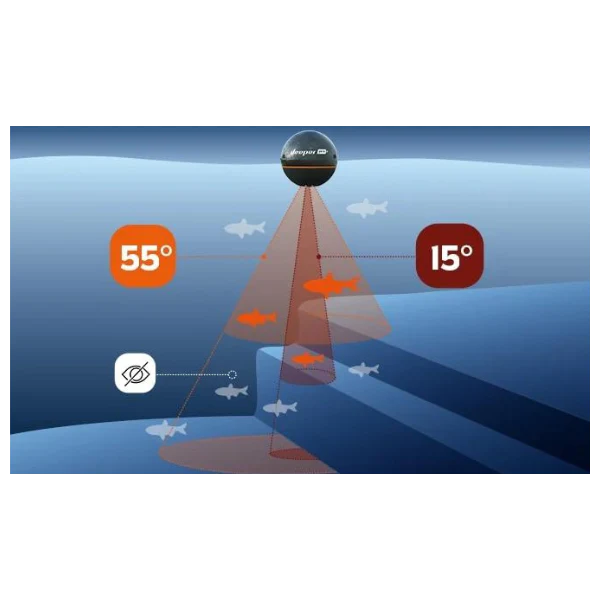
Wide beam scanning (usually 40° to 60° angle) is good for quickly scanning large areas and geting overall information on depth and bottom structure, but the accuracy and detail will be lower. Wide beam scanning is best suited for shallower waters because the cone covers a wider area, the deeper it scans. This means if you are scanning at a depth of 45ft / 13,7 m you will see objects in an area that has a 47ft / 14,3 m diameter.
Narrow beam scanning (around 10° to 20°) gives a more precise picture but covers a smaller area. It is better for finding the exact location of fish. Narrow beam scanning is also better suited for deeper water, as the cone does not spread as wide.
Surface clutter and blind zones
Another factor to consider related to your sonar cone width is that in some cases you will not be able to detect objects just below the surface of the water.
The cause of this is what’s known as surface clutter, which is common to all sonars. Surface clutter appears because the water close to the surface will reflect some of the sonar waves, and these reflections are much too fast for the sonar to process correctly. This reflection has numerous causes, the most common being waves on the surface, bubbles, currents and algae. The result is lots of “sonar noise” close to the surface. This creates a “blind zone“ in which it is not possible to identify fish.
The amount of clutter, and the size of this blind zone, can be reduced if the sonar frequency is higher. So, if you have a Deeper PRO and you are experiencing a lot of surface clutter, switch to scanning with the higher frequency (Narrow beam at 290kHz 15°). In the case of the Deeper START, its 120 kHz sonar frequency means surface clutter can reach down to 1 meter / 3.3 ft. below the surface of the water.
The Deeper PRO+ 2 and CHIRP+ 2 have the least amount of surface noise and clutter, providing accurate readings up to 15 cm / 6" from the water's surface.
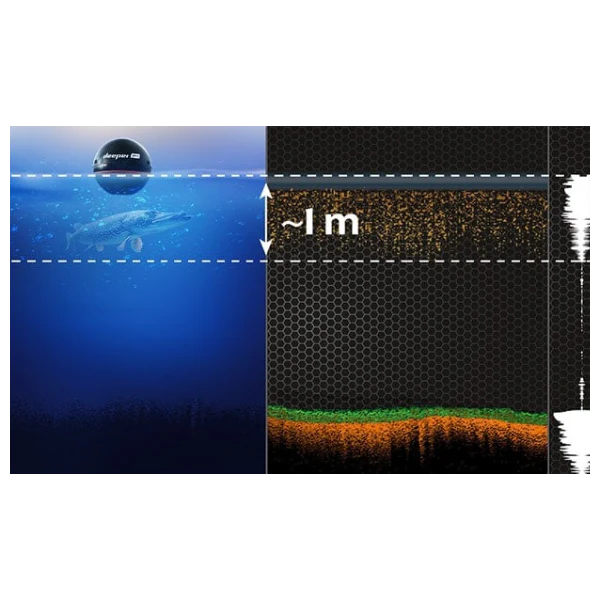
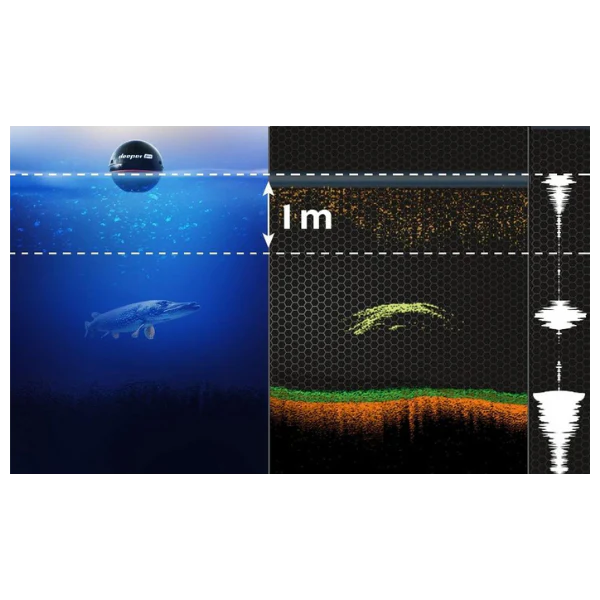
The image below illustrates 2 different situations where surface clutter can affect your sonar readings – (in these examples the surface clutter extends to approximately 1 meter / 3.3 ft. below the surface):
- The fish is below the surface clutter zone. In this scenario, the sonar reflection from the fish is strong enough to be identified by the fish finder (in the case of Deeper fish finders, the Fish Deeper App uses an algorithm to work out if it’s a fish). As a result, the fish is displayed on the app.
- The fish is within the surface clutter zone. The sonar reflection from this fish is mixed together with the surface clutter, making it too weak to be identified by the fish finder. As a result, the fish is not displayed on the app.
Why this matters for …
2. A scrolling screen doesn’t mean a moving sonar (or lots of fish)
On the Fish Deeper App and many other sonar displays the data on screen is shown scrolling from right to left. The far right of the display shows the most recent results, the oldest are on the left. You should remember that your screen will keep scrolling even if your sonar isn’t moving, because the unit is constantly sending and receiving sound pulses. Understanding how this scrolling display works is really important for making sense of the sonar data you receive.
Why this matters for …
3. Thicker lines and second sonar returns mean harder bottoms
Your sonar is capable of telling you not just what the bottom structure looks like, but how hard the bottom is as well. Here’s how.
Sonars measure both the time it takes for a sound pulse to return, but also the strength of the signal that returns too. This enables it to show how hard or soft the underwater objects are. Soft, low density objects return a weaker signal, whereas hard, high-density objects return a stronger signal.
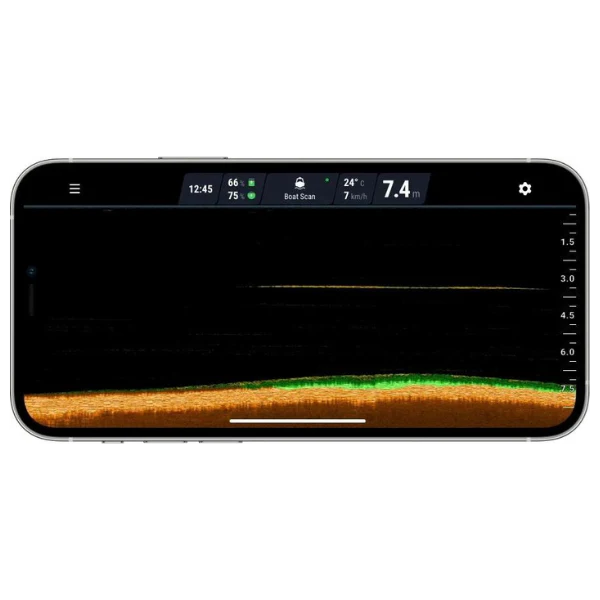
Your sonar display will show you how hard the object is using color and brightness: the more vivid the color, the stronger the signal and therefore the harder the object. This is particularly important when scanning the bottom.
You may notice that the bottom display gets thicker and more intense in some places (hard bottom), then thinner and weaker in others (soft bottom). You might also notice a second sonar return for the bottom. Here the bottom is so hard, the sonar beam has reflected up to the surface, bounced down again, reflected off the bottom and been picked up by your sonar.
-
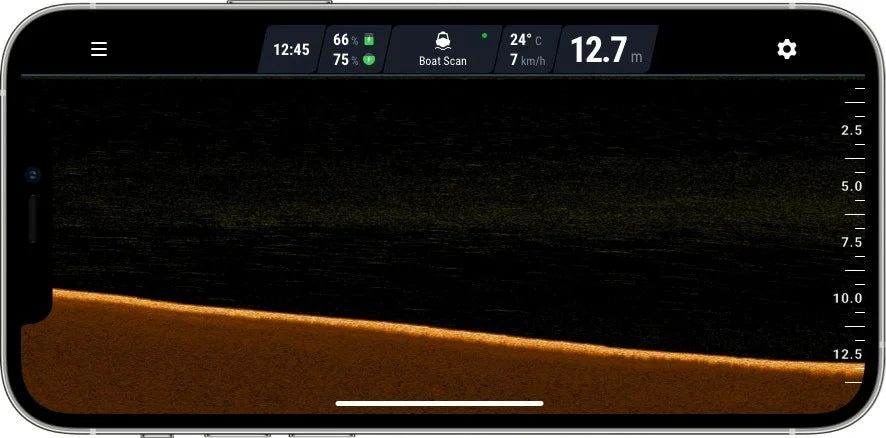
Soft bottom
-
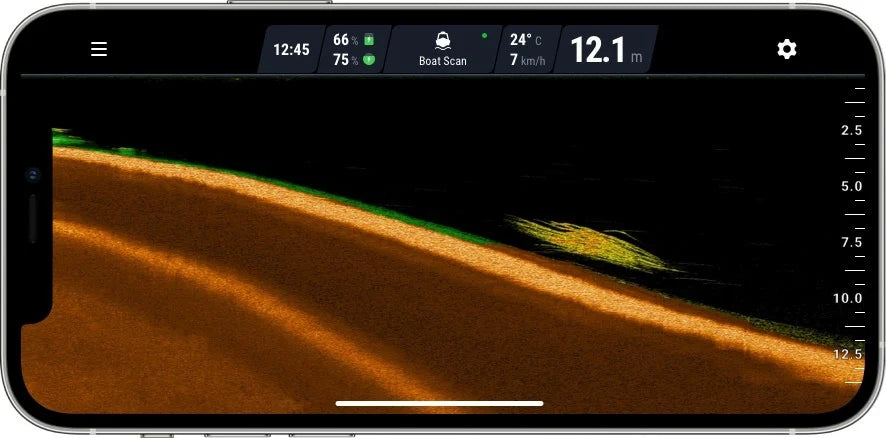
Example of second bottom


Why this matters for …
4. Spot the arches and you’ll find the fish
Using fish icons is a great way to get started with a fish finder, but you’ll be able to identify fish, and fish size, more accurately using the raw data. So, when you’re ready, switch off your fish icons and start looking for arches.
Collapsible content
Why Arches?
In most cases, fish will show up on your display as an arch. The reason why is very simple. If a fish swims right through your sonar cone, it will return impulses from the edge of the cone, the middle and then the other edge. The returns from the two edges of the cone have traveled slightly further than the returns from the middle. So an arch or “fingernail” shape will show on your display.
Spotting the fish
Some important things to remember about fish arches:
- You’ll only get arches from moving fish (or if your sonar is moving over them).
- If your sonar and the fish are both stationary, you will see a line, not an arch.
- You’ll only get a full arch if the fish moves through the full sonar cone.
- If a fish swims through part of your cone, it will show as a half-arch or a thick dash – look out for these.
Think vertical, not horizontal
Long arches mean big fish, right? Wrong. Long arches mean a fish was in your sonar cone for a long time.
And don’t forget, depth matters here – fish at lower depths will create longer arches or lines, because the sonar cone is wider so they remain in it for longer. A huge fish near the surface might only make a short arch or line.
So how do you work out fish size?
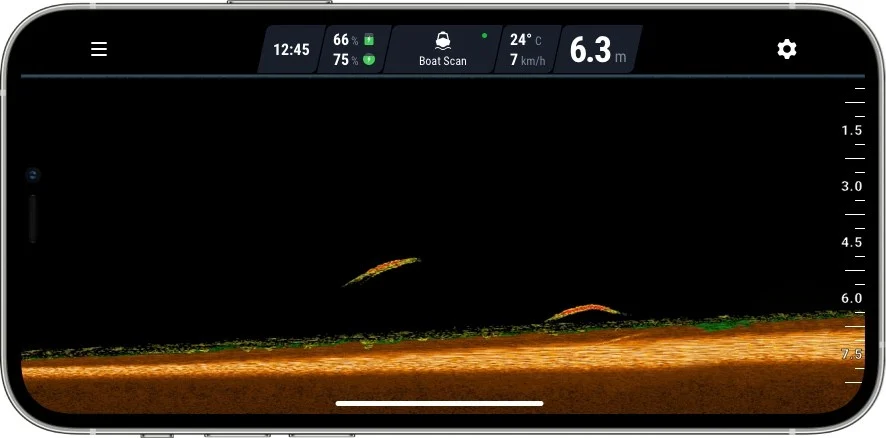
The answer is thickness. If an arch or line is thick, you’re marking a big fish. So think vertical, not horizontal.
The first image is a perfect illustration. These big fish haven’t made a full arch, but the lines are vertically thick, so we know they are big.
And spotting bait fish works the same way. Don’t look for how long the lines are, look for thickness and how clustered the marks are.